October 03, 2024, 07:20:36 AM

Author Topic: [WM] My foam puzzle table  (Read 2717 times)

Offline marell le fou

  • Full Member
  • *
  • Posts: 1154
[WM] My foam puzzle table
« on: October 23, 2017, 05:03:56 AM »
OK, it's for Warmaster but the main thing i wanted to present is the general idea of a table with such material.

Remember those matt you've played with when you where kids (or your children). Yeah, the thing with bisphenol A, etc... :)

It's a long time now i wanted to use them to try to build a wargame table. I had even started some first parts and began a 40K/Epic one. I will transform them to play warmaster on them.

Interest :

- It's supple, so absolutely not fragile.
- Lightweight.
- You can dig reliefs inside.
- Modulable like a puzzle.

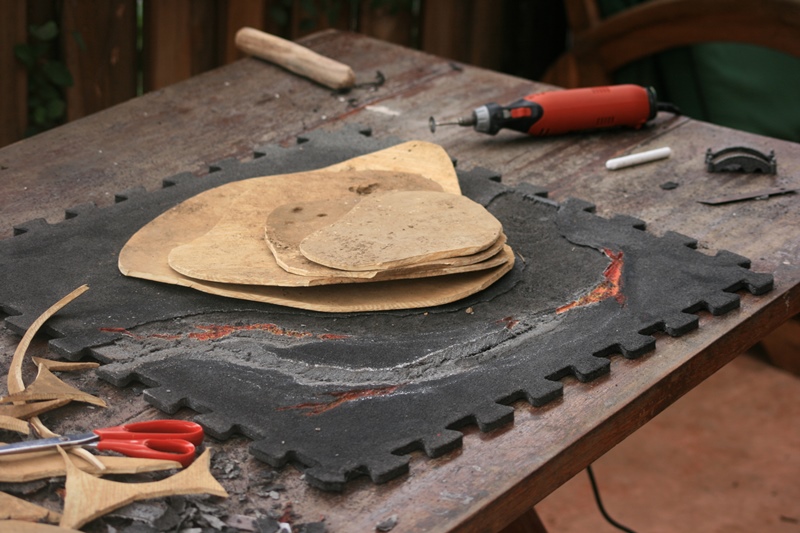
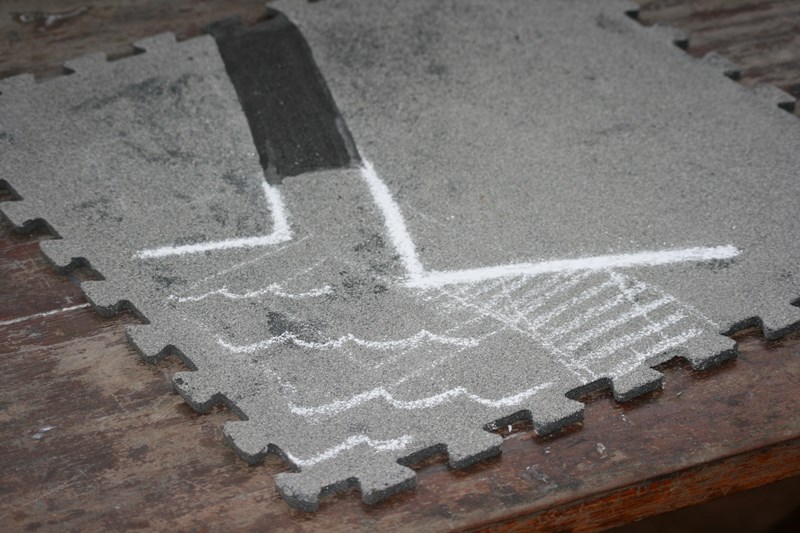
Here. I had those four parts sanded with wood glue.


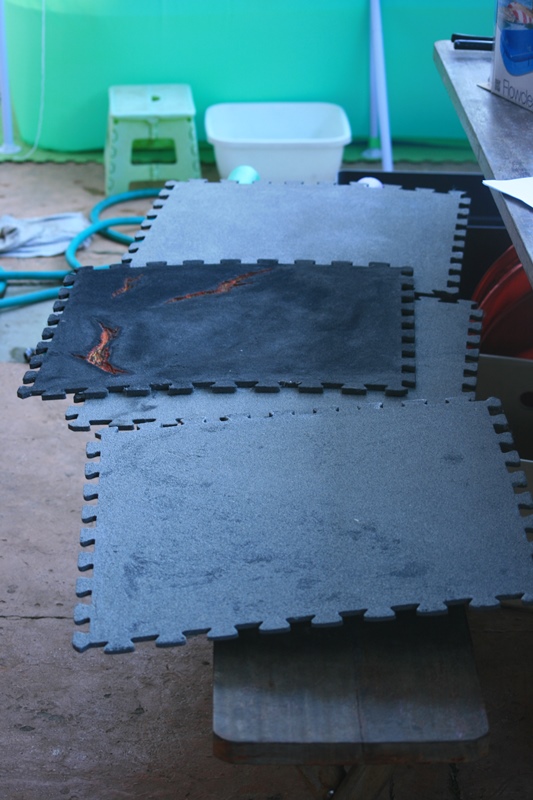
And i will change them to have a river.


In 2 hours yesterday, i have stared to use this tool to dig the foam.


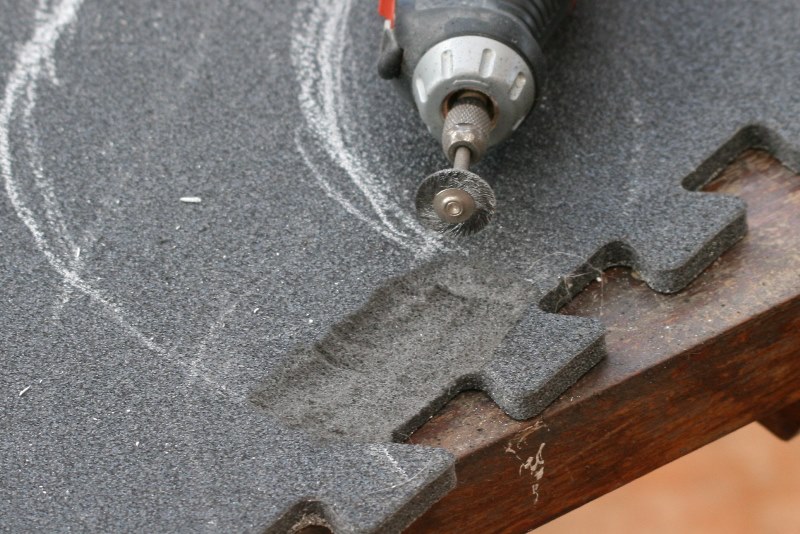
Not an important thickness, but it should be sufficient to give an impression of small deapness.


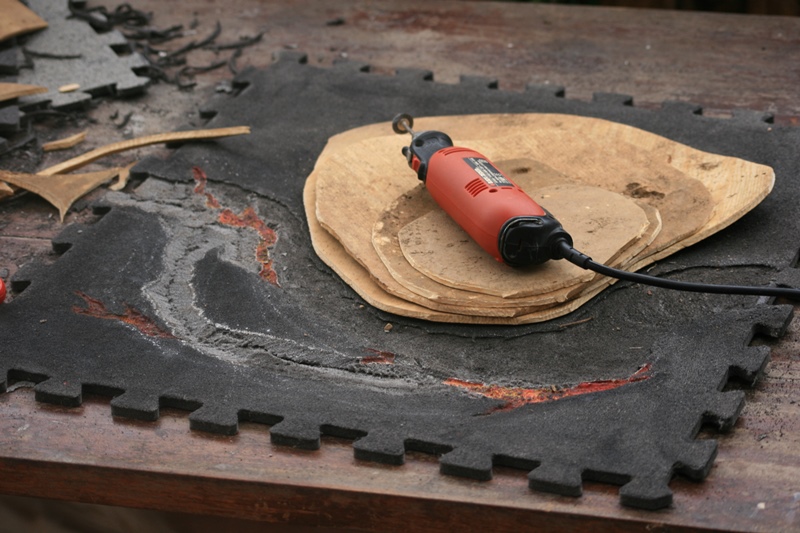
I have manage to find a good way to dig the foam by stripping small bands. Don't try to do moret han that or your tool will bite in the foam and either be blocked or dig a too big hole.


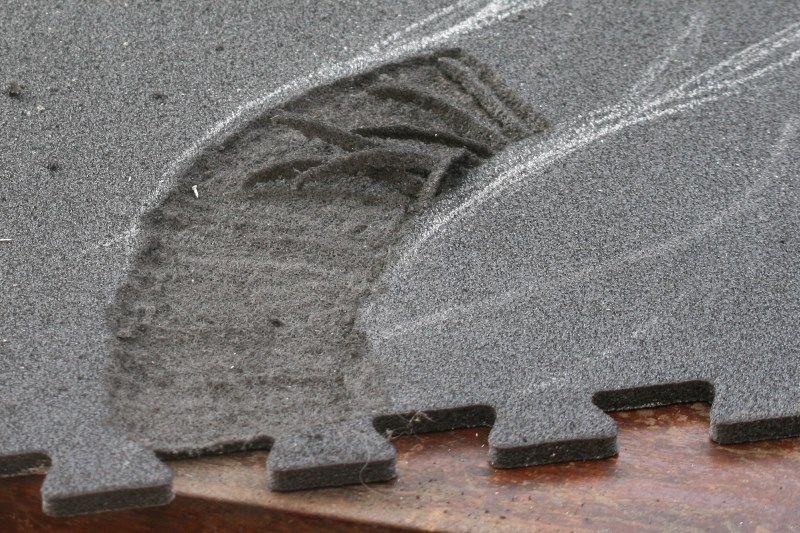
And here is the proto-river. It's a small river, with a slow debit, so it makes curves. It justifies the slightly inclined edges.


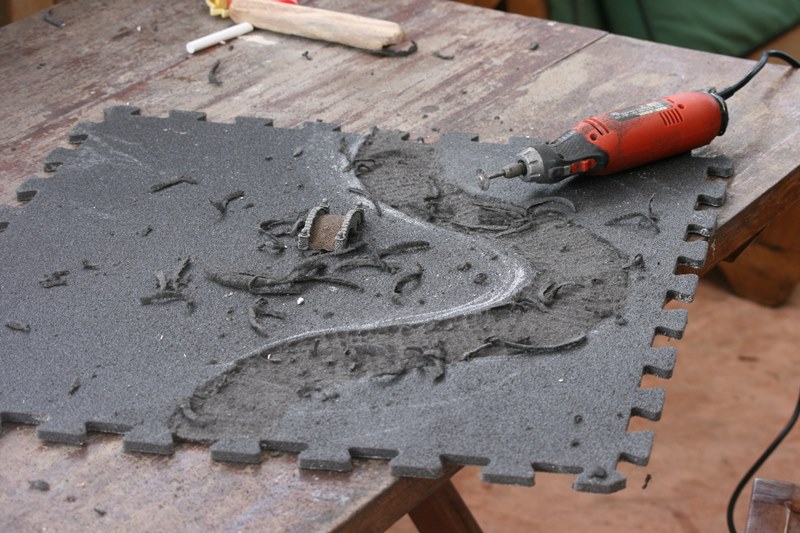
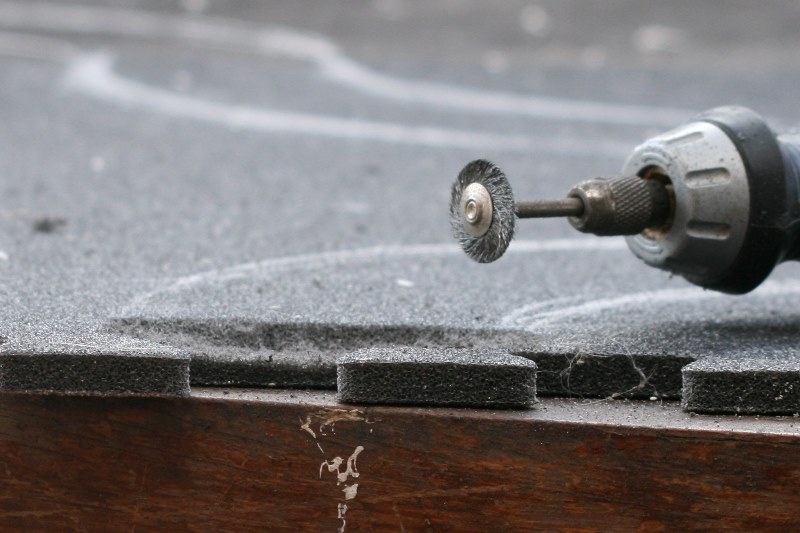
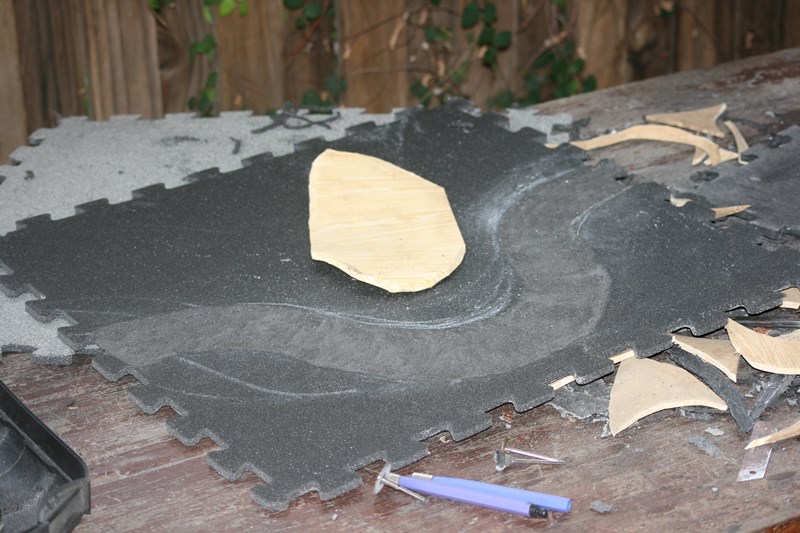
Then, i changed my tool for a metalic but vertical brush, to erase the marks of the stripping in bands.

You can see it's a little bit flatter on the beginning of the puzzle.


Marks remains a little but it's better like that.


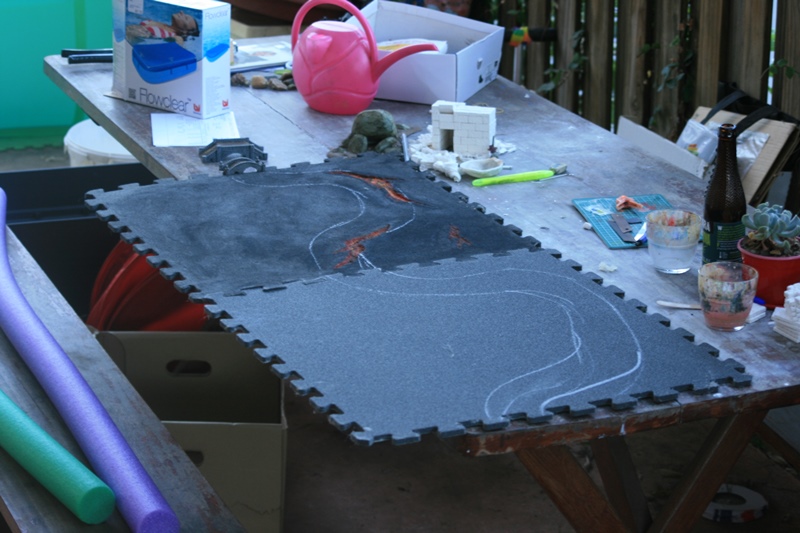
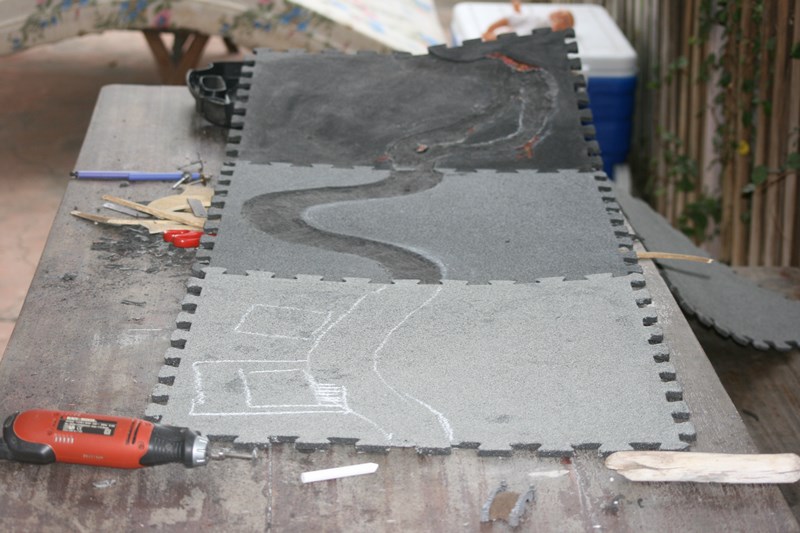
Here we are when it's done.


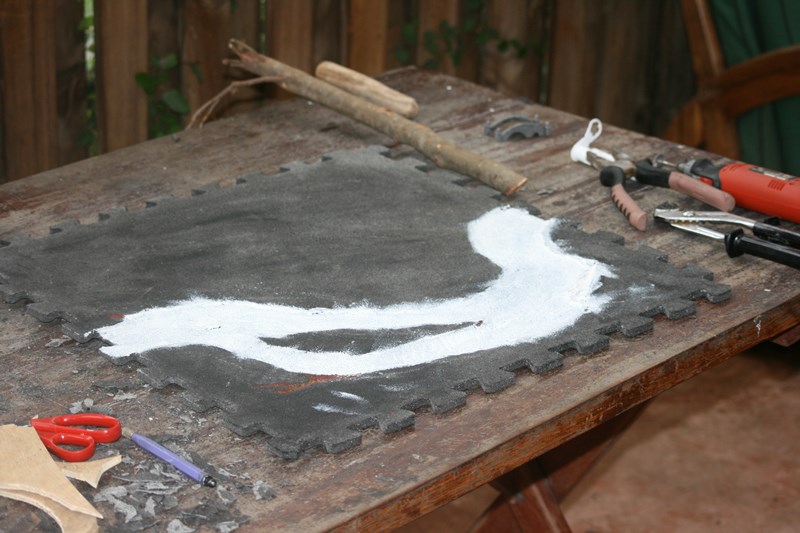
Second part. I had crevasses with lava, and i needed to cancel them.


Wood glue was hard to remove, so i have worked again with my first tool, but holding my drill verticaly. And this cutter blade for too ig parts.


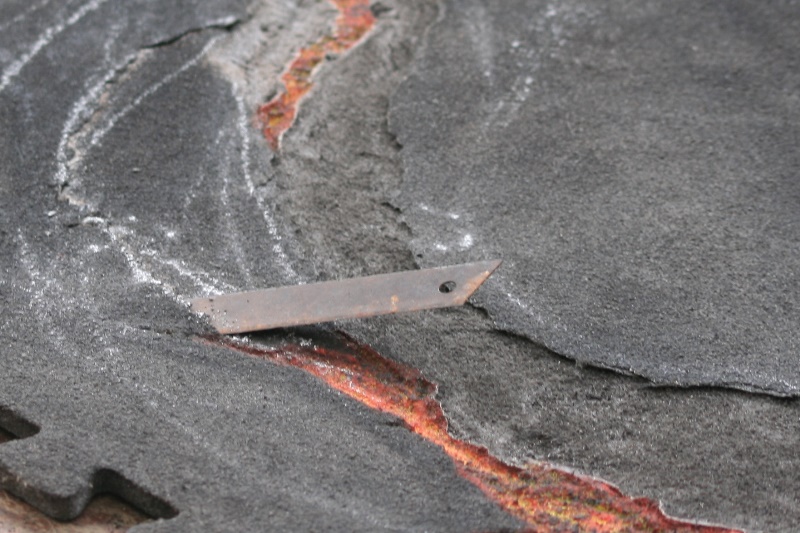
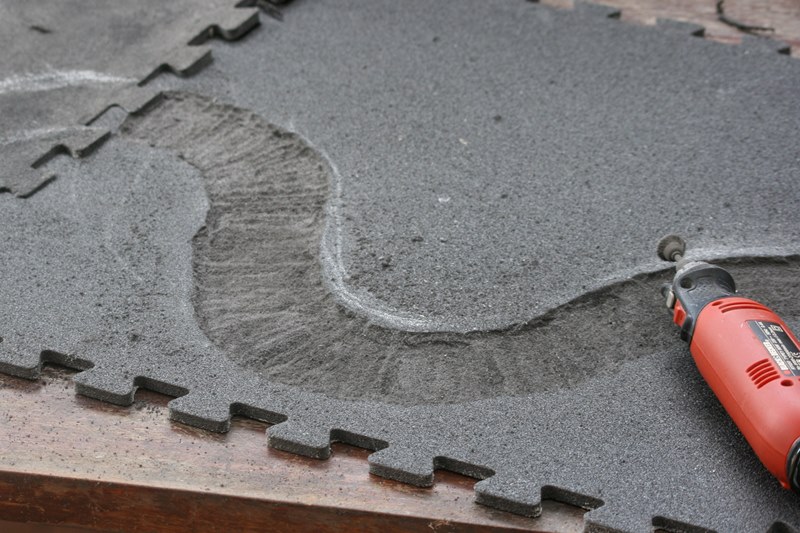
This part will have a ford, where the rivers slows. It's because it meets a hill, that breaks its speed, forcing it to curve.


The river arrives by the right, is blocked by the small cliff, and then the stream is slowed and the river even makes a small island in the middle.


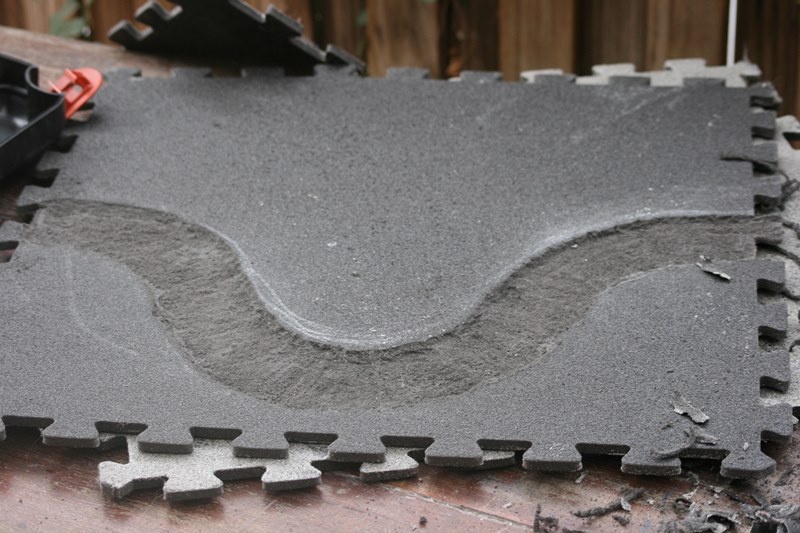
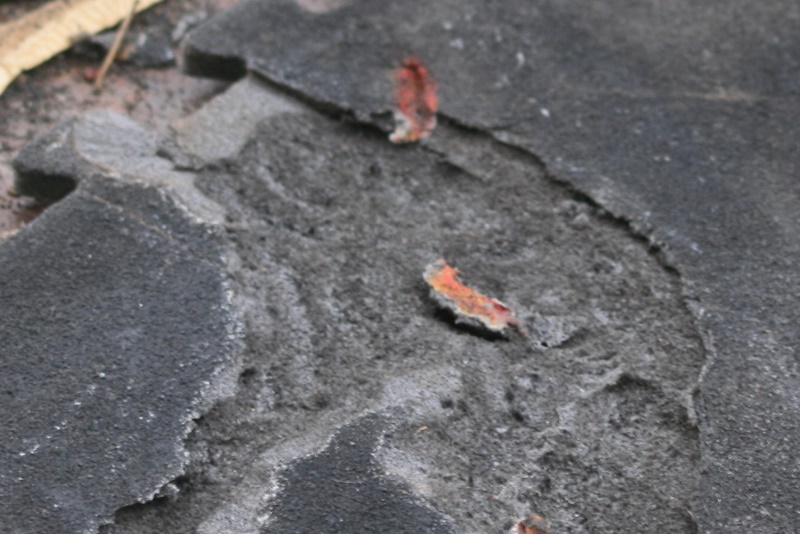
Here i have pierced my foam mat... It had to arrive at least once.


Digging is done... I manage to keep the river on one side of the foam square. So if we don't want to play with it, it will be easy to manage to keep it apart, on the edge of the playing zone..


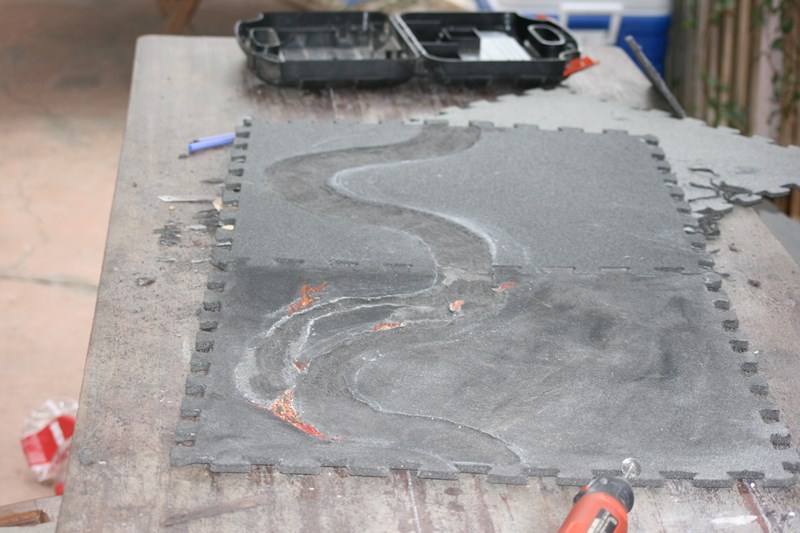
Here, there will be a small elevation. Not considered as a hill, but i wanted to have small reliefs. I'm bored with absolutely flat tables. I want to see realistic hollows and bumps.


First study for the last one. A more urbanised zone, where the river is forced straight by a canal with small docks, etc.


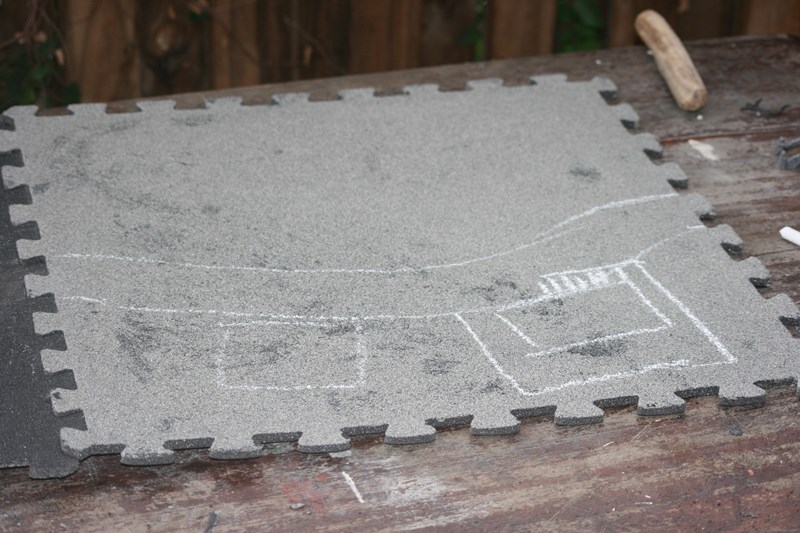
Andi had at first thought of bassins, or someting like that, after what the river return to its natural flow.


I began to dig but was not satisfied so i stopped to think of it again. I like the bassin idea but it alsao remove playing surface. And a just straight river in the middle of nowhere did not convinced me.

Andi told me that docks frequently meanet sea. And that a sea corner could be great. It's maybe not completly definitive but i like it better like that. With sea on the corner, and a beach where it's storked.


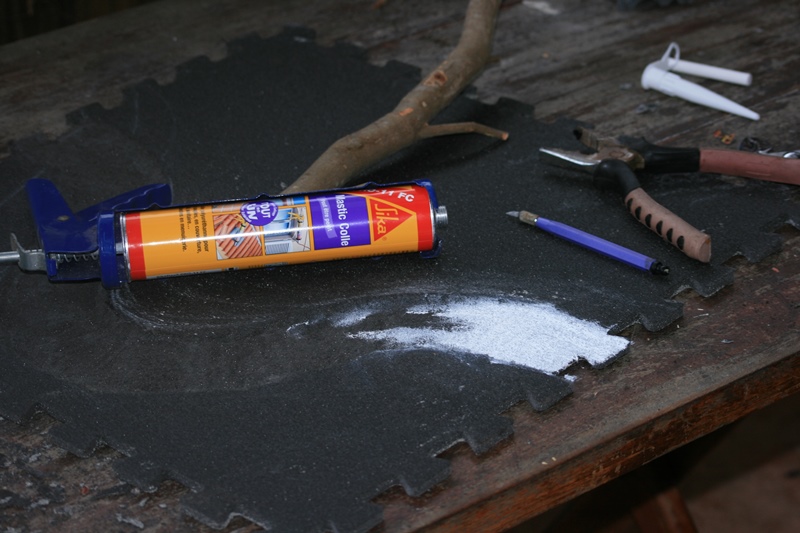
After that, i have added in the bottom of my river Sika glue. I don't want to make any advertisement, but you can paint it and it does not retract while drying. It's not the case of many other products like that.

I manage to spread everything with my fingers, what was a bad idea because it only clean with white spirit. And i hate putting some on my hands because it smells. Maybe an oiled tool or even a potatoe or something for next try.


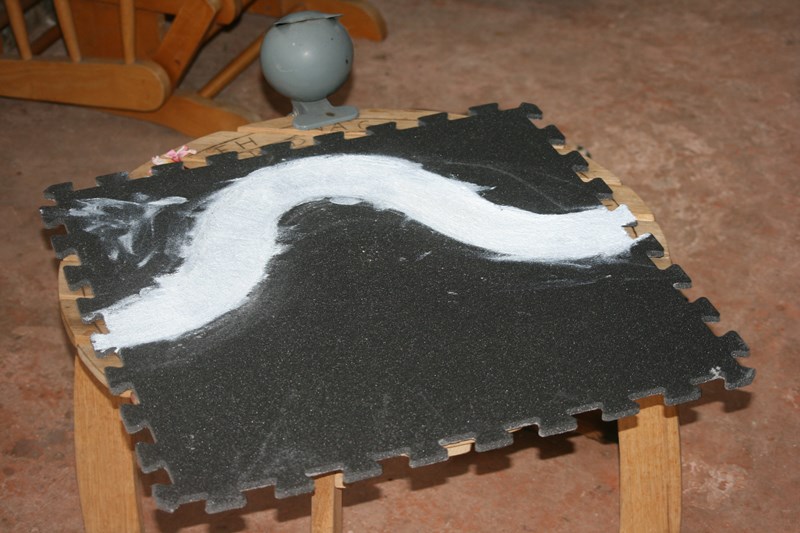
First river is done. Foam is still visible for i manage to put as few silicon as possible. With a second layer, it should be flat.


Here is the second part.


I will put some all over the edges of the puzzle parts. It should not be removed easily, while the melange wood glue+ sand crackles.


Curieux de vos réactions.

Offline Geep

  • Full Member
  • *
  • Posts: 900
Re: [WM] My foam puzzle table
« Reply #1 on: October 23, 2017, 08:46:09 AM »
It's an interesting idea. I look forward to seeing the end result.

Offline marell le fou

  • Full Member
  • *
  • Posts: 1154
Re: [WM] My foam puzzle table
« Reply #2 on: October 23, 2017, 10:13:50 PM »
Me too !

It will be interesting mainly if i can obtain something that do not crackle when rubbed on the edges. The puzzle parts are sometime a little bit hard to set up, and i need a very supple way of texturing my foam.

So Sika it will be on all the edges, i think. Hope it will be sufficient and strong enough to stay strong during several months or even years.

Offline marell le fou

  • Full Member
  • *
  • Posts: 1154
Re: [WM] My foam puzzle table
« Reply #3 on: November 02, 2017, 03:32:03 AM »
New advances...


Before potatoe use.


And after potatoe :)


Addition of small rocks to have a cliff.


And covering with foam plus silicon.


Offline Stormwind

  • Veteran member
  • *
  • Posts: 2750
  • Ben Sibbald | Newcastle, UK
Re: [WM] My foam puzzle table
« Reply #4 on: November 02, 2017, 05:17:10 PM »
Interesting to watch this develop!
My Personal & Modelling Blog >>http://theancienttrack.blogspot.co.uk/

Offline Grumbledook

  • Active Member
  • *
  • Posts: 90
    • Loc: Uk
    • It's a hobby, not an addiction
Re: [WM] My foam puzzle table
« Reply #5 on: November 07, 2017, 08:46:08 PM »
Very exciting project. Does the white filler stick to the foam sections?

Just a thought, but would latex mixed with sand be a nice flexible combination for a lightly textured surface? It Should bond with the foam and paint up pretty well with acrylics too.

Offline marell le fou

  • Full Member
  • *
  • Posts: 1154
Re: [WM] My foam puzzle table
« Reply #6 on: November 07, 2017, 09:31:08 PM »
Thanks for the comments, guys.

Quote
Does the white filler stick to the foam sections?

Yeah, absolutely. Far better than wood glue (it crackles and separate from foam with time).

I have sanded the foam to have a better sticking, but i'm not even sure it was needed. But well, it was 2 minutes so it's probably worth it.

Quote
would latex mixed with sand be a nice flexible combination for a lightly textured surface?

Maybe, but not sure. Silicon+sand would probably be more or less the same, and i'm not sure it would be as easy than pure silicon to apply.

For now i have experienced :

- Small silicon layer + addition of sand + pressure. Let dry.
- Silicon again and scrapped well to remove 90% of the silicon to keep a textured effect. The point is to seal the sand in the silicon definitively. As i did with wood glue in my classical sceneries, in fact.

It seems to have worked.


Offline marell le fou

  • Full Member
  • *
  • Posts: 1154
Re: [WM] My foam puzzle table
« Reply #7 on: January 17, 2018, 02:53:18 AM »
Just aw i had not updated this post for months. I have worked hard on that, and have loads of new pictures.

So, at first i confirm silinonnig, then sanding, then re siliconning is a good option. You have flexibility, well anchored sand, and if you scrub the second layer hard enough, you still have the texture of the sand.

So, since last time, the big hill has been sanded.


And an other one, on the river too, has been set up on an other sheet.


I have began a third sheet, that wille be coastal and have a small warf. I had to remove the old woodglue+sand layer. Long and penible, but it allowed me to have proof that silicone + sand is a better option.


And i have resolved the problem of the white spots that sometime appeared when painting is crackling with brown silicon ! I must make an effort not to eat it with bread when i use it but i will be strong.


Sanding and siliconing the great hill... Again and again. Now that i have done it once, it's fastest, but this sheet was long to prepare.


First painting layer with "natural shade" colour (pebeo colour).


And various tests for the second layer.


A yellowish layer.


And a green dry brush.


And some others.


And here are my two first sheets.


A fourth sheet with a swamp (i had to remove the mark of the producer).


Preparing the harbour...


And the river.


I have tried several ways of painting the river but i'm not at all satsfied and will remove them.


The swamp before addition of the water.


But the water i have used was a new test that revealed absolutely not convincing (MIG river). I have probably not used it as i should have.


Sanding and siliconing this fifth sheet.


It's finished, at last... And a sixth sheet too. Just flat. Maybe i will add a small and low hill or something.